8.17.2014

DIY: Wall Decor Re-Do


Over the past few months while I was envisioning (Pinterest-ing) the décor for my new room I routinely was drawn to photos like these…

They all feature a mirror with a type of sunburst centered over the bed.  Several months ago I found a similar piece at Burlington Coat Factory that was originally $39.99 however, a few pieces of glass were missing from two of the “spoke” and it had been marked way down.  I decided there must be a way I could fix it so when I cashed out I also asked if there was any way they could mark it down even more since it was clearly broken.  They agreed to give me further 10% off so I ended up stealing this little bugger for 9 dollars.


Since then, it’s ridden around in the trunk of my car for a few weeks, moved to a new place and then sat some more in a spare bedroom.  All the while I was pondering its mini-makeover.

Then I came across photos like this...

... and I decided the fastest, easiest and maybe prettiest way to tackle this project was spray paint!  I read up on a few blogs about how to spray paint plastic, as my mirror was made of metal, glass and plastic, the latter being somewhat tricky to spray paint.
There is a newer product out there by Krylon called Fusion, which is made specifically for plastic.  I picked up a can in Satin White as well as some masks and a thin layer of plastic for about 8 dollars meaning this entire project was completed for under 20 bucks!  That is what I call a win.


  1. Remove excess glue, paint, etc. from surface.

  2. Gently sand down all surfaces to be painted.

  3. Clean surfaces.
  4. Cover any areas that will not be spray painted with painters tape. 
5. Begin spray painting as normal. Several coats may be needed depending on your surface.


6. Let dry for several hours and hang your masterpiece!


8.13.2014

Protein Powerhouse: Crispy Chickpeas


Things have been a little crazy around here lately.  I am in the middle of a work-17-out-of-19-days stretch, which includes 3 different jobs, one of which is full-time.  We also have a new member of the family at my house, my roommate's new, 8 week old puppy, Rex.  If I thought summer was flying by before, it sure is now.

In the midst of preparing the house for my friend, Mary to stay with us this week while she is in her last week of her dietetic internship (hooray!), I found some time to make these crispy chickpeas.  I had made some delicious pancakes for breakfast (my FAVORITE) but neglected to make an egg or some other protein so I ended up ravenous barely two hours later.  I always have a few cans of black beans and garbanzo beans on hand for just such an occasion, when protein is just what the stomach ordered.

I've made this recipe various ways in the past and they key is to PAT THE CHICKPEAS DRY.  If you don't, they just will not crisp up the same way.  I'm telling you now.  Don't forget this.  (Can you sense that perhaps I forgot to do this amongst puppy potty breaks this weekend?)

Like other beans, nuts or seeds, chickpeas are high in calories (about 730 per cup), which is why it is important to watch your serving size.  However, they are high in fiber and an excellent source of protein so you can feel good about snacking on a handful or adding them as salad toppers.

These things are addicting and some other equally delicious flavor variations include Lemon and Dill or Garlic and Parmesan (just add the Parmesan cheese close to the end of cooking time).  


Shake, shake, shake.
Take a break to let the newest roommate outside for a snack!


Crispy Chickpeas
Serves 6

Ingredients:
2 cans chickpeas (aka garbanzo beans)
Non-stick cooking spray (I use olive oil blend)
2 tbsp. olive oil
½ tbsp. Old Bay seasoning
½ tbsp. Italian Seasoning or other dried herbs
½ tsp. salt

Directions:
Preheat oven to 350 degrees F.  Drain and rinse chickpeas.  Be sure to pat dry with a paper towel.  In a medium bowl, combine chickpeas, olive oil and seasonings.

Spray large cookie sheet with non-stick spray.  Spread chickpeas onto cookie sheet in single layer.

Cook for about 50-60 minutes. Every 20 minutes shake the pan gently to rotate chickpeas.  Let cool for about 1 hour to let chickpeas crisp up.  Enjoy within 1 day.

Nutrition Facts: 286 Calories, 9g Fat, 40g Carbohydrates, 13g Protein, 12g Fiber, 370mg Sodium, 584mg Potassium


8.08.2014

Summer Squash Bake

It’s that time of year where gardens are in full bloom and tomatoes and zucchini seem to be multiplying by the minute.  I personally love zucchini in breads or as zucchini pancakes but I’m not as crazy about summer squash.  This recipe I made over the weekend for my mom and I turned out to be a delicious way to use those suckers up before they grow too big. 
This recipe happens to be vegetarian and can be served as a main dish or as a side.  We paired it with salmon and roasted red potatoes and green beans where it got a stamp of approval from my carnivorous dad!  Love it when that happens.
Happy, healthy eating!


Summer Squash Bake
Serves 4-6

Ingredients:
2 small zucchini
2 small summer squash
2 medium tomatoes
1 cup milk
2 eggs
1 tbsp. flour
½ cup shredded cheese (such as mozzarella, cheddar or parmesan)
¾ cup panko breadcrumbs
½ tsp. Italian seasoning or Herbs de Provence
¼ tsp. garlic powder
salt and pepper to taste

Directions:
Preheat oven to 350 degrees F.
Slice zucchini and summer squash into ¼- ½ inch rounds, trying to keep pieces the same size.  Place in baking dish, alternating zucchini and squash until you fill the bottom of the dish.  Slice tomatoes and place on top of squash and zucchini.
In a small bowl, combine milk, egg, flour, salt, pepper, Italian seasoning and garlic powder.  Whisk with a fork and pour over vegetables in baking dish.  Sprinkle cheese on top of tomatoes. 
Season the breadcrumbs with a small amount of salt, pepper and Italian seasoning.  Pour in an even layer over contents of baking dish.  Cook for 25 minutes or until golden brown and vegetables are tender but not overcooked. 


Nutrition Facts: 171 Calories, 7g Fat, 19g Carbohydrates, 10g Protein, 2g Fiber, 146g Sodium, 419g Potassium

8.03.2014

Lovely Lemon Rosemary Scones

Ah, Saturday.  I am facing a seven-day work week so this Saturday was a welcome day off and I decided to relax a little and enjoy it.  I went to my friend Sarah's wedding in the afternoon and it was absolutely beautiful.  As usual, I visited the Farmer's Market after my coffee and I made a stop to the grocery store as well for a few items for breakfast.  I decided to spend a little extra time and make these Lemon Rosemary Scones.


As I have mentioned before, I am not a baker.  I actually don't enjoy it the way I do cooking because I like to change the recipe too much which is never a good idea in baking.  That said, these scones are wonderful and if I can make them, you definitely can.   

I did take a risk and made a few healthy changes. I know, I can't help it, it's an addiction.  I added Greek yogurt which allows you to replace an entire stick of butter, while adding protein.  I also swapped in 1/2 a cup of white flour for whole wheat flour.  Lastly, I cut out the sugar entirely and put in just a touch of agave nectar.  

The outside is slightly crispy while the inside is soft.  The sweet glaze pairs well with the fresh lemon and piney rosemary.  These scones are a great addition to brunch or with afternoon tea.  I dare you to eat just one!


Dogs like yogurt in scones, too!


Lovely Lemon Rosemary Scones
Makes about 16 scones

Ingredients:
1 1/2 cups flour
1/2 cup whole wheat flour (plus extra for work surface)
1 1/4 tsp. baking powder
1/4 tsp. baking soda
1/2 tsp. sea salt
1/2 cup (1 stick) unsalted butter
1/2 cup vanilla non-fat Greek yogurt
1/2 cup 2% milk
3 tbsp. fresh rosemary leaves, finely chopped
zest of 1 1/2 lemons
juice of 1 1/2 lemons
1 tbsp. agave nectar

Glaze:
1 cup powdered sugar, sifted
1 1/2 tbsp. 2% milk
zest and juice of 1/2 lemon
1/2 tsp fresh rosemary leaves, finely chopped
dash of salt

Directions:
Preheat oven to 400 degrees.  Prepare the glaze and set aside to allow flavors to come together.

In a large bowl, mix together dry ingredients with a whisk or sift.  Cut cold butter into 1/2 inch cubes and work into dry ingredients until pea-sized pieces remain.  Stir in yogurt until well mixed.  Add in half of the milk, lemon juice, lemon zest and rosemary.  If dough looks dry add in additional milk 1 tbsp. at a time.

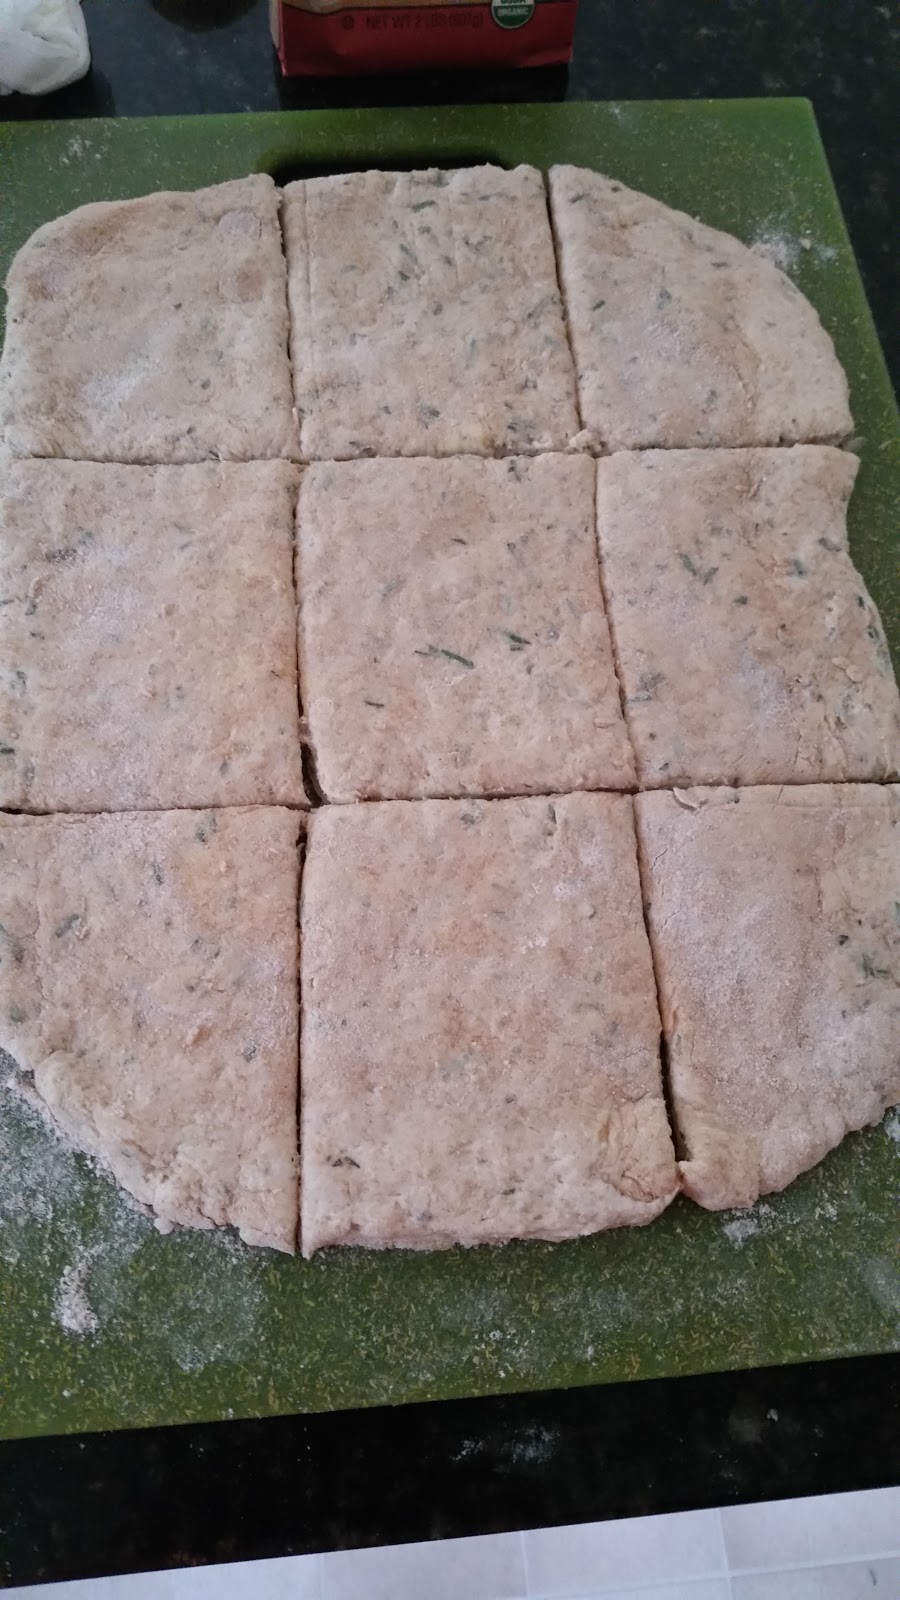
Coat work surface, hands and dough if needed with extra flour (I used whole wheat).  Work into large rectangle, until dough is 1/2 inch thick, smoothing the edges as you go.  Cut dough into 12 rectangles and cut each rectangle diagonally.  If using a cooking stone, flour the stone and place scones about 2-3 inches apart.  Otherwise, place scones on parchment paper or baking mat on a cookie sheet.  Bake for 18 minutes or until golden brown.

Allow scones to cool and drizzle with glaze (there will likely be some left over).


Nutrition Facts: 130 Calories, 6g Fat, 17g Carbohydrates, 3g Protein, 1g Fiber, 121mg Sodium, 69mg Potassium


8.01.2014

Garlic Ginger Tofu and Broccoli

For a vegetarian, or rather pescatarian (I eat fish and shellfish), I don’t eat a lot of tofu or imitation meat products.  The usual packages of tofu are too large for just me and some of it ends up wasted.  However, when I make my way to Trader Joe’s for their sprouted tofu, which comes split into two small packages, I have no excuse.  One half either goes to my mom or goes in the freezer.  The other half is just the right size for just me or to share. 


Does anyone else find tofu to be a little…blah?  While slightly less healthy, I have found that crisping the edges up in a sauté pan helps improve the texture to something much more desirable.  Toss with some broccoli and homemade garlic ginger sauce and you’ve got a protein-packed dinner fit for vegan and carnivorous guests alike!


I just love these bowls!


Garlic Ginger Tofu and Broccoli
Serves 2

Ingredients:
6 oz. extra-firm tofu
2 cups broccoli
2 tbsp. olive oil
Sea salt to taste

Garlic Ginger Sauce:
1 tsp. minced garlic
1 tsp. lime juice
1 tsp. low-sodium soy sauce
1 tsp. rice wine vinegar
¼ tsp. sesame oil
½ tsp. agave nectar
¼ tsp. ground ginger
1 tsp. sesame seeds (plus extra for topping)

Directions:  Combine ingredients for dressing, whisk and set aside. 

Heat oil in medium skillet on medium heat.  Lay several layers of paper towel or a clean kitchen towel on top of tofu and press to drain liquid.  Slice tofu into ½ inch pieces.  Add to skillet and cook for about 5 minutes or until golden brown (cover skillet partially to prevent oil from splattering).  Try not to move tofu until ready to flip.  Cook for another 2-3 minutes.  Place tofu on a plate lined with paper towel and sprinkle with a pinch of salt.

Steam or sauté broccoli in the same skillet for 1 minute.  Add garlic ginger sauce and continue to cook until broccoli is tender.  Gently add in tofu for 1 minute.  Sprinkle with sesame seeds and serve. 


Nutrition Facts: 254 Calories, 20g Fat, 11g Carbohydrates, 12g Protein, 300mg Sodium, 3g Fiber, 409g Potassium